In this part, I’m going to start discussing how I handled the screen at the start of this process, and the reasons behind these choices. I said in the first part that you could simply read the C64’s screen memory and print it, so what did I mean by this?
Since the C64’s default screen lies at location $400, the screen values can be read and drawn by simply looping over the screen and building up a string – like this…
var screen=$400;
for(var yy=0;yy<25;yy++)
{
   var s="";
   for(var xx=0;xx<40;xx++)
   {
      var ch = pMemory[# screen++,0];
      s=s+ch;
   }
   draw_text(0,yy*8,s);
}
However, there is a complication in this simple method, the commodore screen doesn’t display standard ASCII, but its own character map. 0=@, 1=A, 2=B… and well, it goes on. So the first thing we need to do is create a quick lookup table of CBM text to ASCII so we can use normal printing.
CharacterLookup=0;
CharacterLookup[0]='@';
CharacterLookup[1]='A';
CharacterLookup[2]='B';
CharacterLookup[3]='C';
CharacterLookup[4]='D';
|
| More
|
CharacterLookup[93]=']';
CharacterLookup[94]='|';
CharacterLookup[95]='-';
CharacterLookup[96]='*';    // inverted space (for now)
With this table created, we can redo our loop to look like this…
Now, this won’t give a terribly nice image with the Arial font, but if we Google around, we can find a lovely C64 TTF font, and using this we can render a reasonable facsimile of the screen. It’s nowhere near the correct size of course – I think it was creating an image about 400 wide, by about 280 high, but you got the look and feel of it.
var screen=$400;
for(var yy=0;yy<25;yy++)
{
   var s="";
   for(var xx=0;xx<40;xx++)
   {
      var ch = CharacterLookup[ pMemory[# screen++,0] ];
      s=s+ch;
   }
   draw_text(0,yy*8,s);
}
This was the 1st step, but as I progressed I needed the font to be the perfect size and shape (8×8 pixels), so that I could start to render colour bars and so on. Without doing this, colour changes would never match up characters or the screen display as a whole. For instance, if a raster split that was supposed to be half way down the screen, would in fact be a quarter the way down the screen, as our font was just too large.
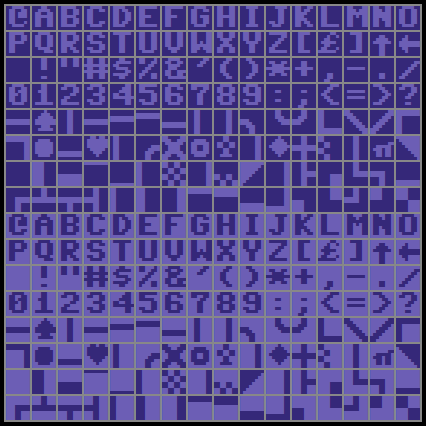
With this in mind I did a quick Google and found the C64 font as a square block of 16×16 characters (shown above – 128×128 pixels in size, as each character is 8×8). I pulled it into an art package and created a single row of 256 characters – a section of which is shown below.

I then made the font colour white, and removed the background so it was an alpha of 0 (shown as black). With this done, I could then import it into GameMaker as a sprite strip, giving us a single sprite (called sFont) with 256 sub sprites. At which point, we can now change the inner loop above to this…
   for(var xx=0;xx<40;xx++)
   {
      var ch = pMemory[# screen++,0];
      draw_sprite(sFont,ch,xx*8,yy*8);
   }
You’ll see we can also now ditch the character conversion, as the GameMaker sprites are in the same order the C64 expects them, so no conversion is required. It also has the added benefit of making the screen the correct size (as we’re now using the proper C64 bitmap font) and everything sharper as well – which is nice.
Now, while this may seem like a step backwards, the reason for making it WHITE (and not the default blue the C64 normally uses), is that it means I can now colour tint it using the actual C64 colours. The C64 colour screen is the same size as the character screen and is located at a fixed location of $d800, although only the lower nibble (the bottom 4 bits) are valid, giving us 16 colours to choose from (as shown below).
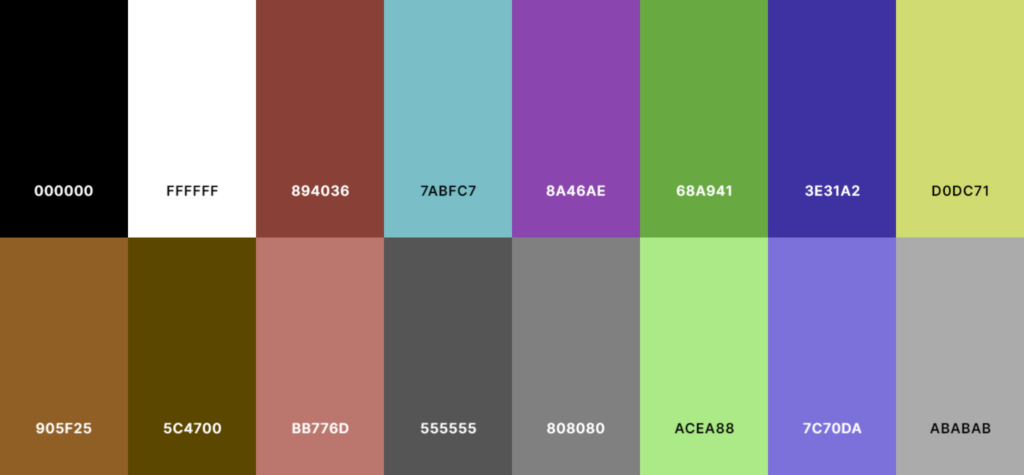
In order to convert from C64 colours (which are 0 to 15) into something we can use, we first have to create ourselves a Palette, and I do this with another quick table to convert between the C64 colours, and real RGB values like this…
// colours have no ALPHA in them....
Palette[0]=$00000000;
Palette[1]=$00FFFFFF;
Palette[2]=$002B3768;
Palette[3]=$00B2A470;
Palette[4]=$00863D6F;
Palette[5]=$00438D58;
Palette[6]=$00792835;
Palette[7]=$006FC7B8;
Palette[8]=$00254F6F;
Palette[9]=$00003943
Palette[10]=$0059679A;
Palette[11]=$00444444;
Palette[12]=$006C6C6C;
Palette[13]=$0084D29A;
Palette[14]=$00B55E6C;
Palette[15]=$00959595;
The colours I use are copied directly from the extraordinary VIC chip colour analysis by Philip “Pepto” Timmermann, which you can find here:
Commodore VIC-II Color Analysis
This is amazing work, and once I had this, I was then able to build the table above and change the loop once more into something that gives a far more familiar result….
  var screen = $400;
  var colour_ram = $d800;
  for(var yy=0;yy<200;yy+=8)
  {
     for(var xx=0;xx<320;xx+=8)
     {
        var ch = pMemory[# screen++,0];
        var col= Palette[ pMemory[# colour_ram++,0 ]&$f ];
        draw_sprite_ext(sFont,ch,xx,yy,1,1,0,col,1.0);
     }
  }
And hay presto! We have a proper C64 screen, using the proper C64 font at the proper size – AND as an added bonus, using real C64 colours! Result! You’ll see from the image above, you can now actually change the screen memory AND the colour RAM, and the emulator picks this up and displays it just as it should. One step closer….
With this done we can now actually try and load some games in, and try to see what would happen.
Commodore games are stored in several formats, but for our needs, the .PRG file format is by far the simplest. A .PRG loader is in fact incredibly simple as it’s basically just a start address, and a stack of bytes to put there, so it’s simply a case of loading the thing into GameMaker, and then copying it into the emulated memory. As strange as it sounds though, you do have to tell the C64 about the start/end of BASIC based on the size of the file, as many decompressors use this to actually know how much has been loaded. So, using buffer_load() I load in a binary game file, get the first 2 bytes and use this as the start address (read as a u16), copy the remaining data directly into memory, and then set the start and end address of BASIC. Once that’s done… you can just type run. Here’s the load function I use….
/// LoadPRG( filename )

var buff = buffer_load(argument0);
var size = buffer_get_size(buff);
debug("size="+string(size));
var Add = buffer_read(buff,buffer_u16);
var Address=Add;
size-=2;

var EndAdd = Add+size;
for(var i=0;i<size;i++){
    pMemory[# Add++,0] = buffer_read(buff,buffer_u8);
}

Doke($2b,Address);
Doke($2d,EndAdd);
Doke($2f,EndAdd);
Doke($31,EndAdd);

buffer_delete(buff);
Doke() is basically a 16bit version of Poke(), so as you can see – It’s not exactly rocket science is it! Most games will now load and run, and if they don’t change the default screen location, you can actually see something meaningful. This is start menu from Finders Keepers for example…
So, the last thing I want to talk about this week, are colour bars. You see the problem with colour bars is that it requires scan line rendering. This is because C64 developers just loved to change them every line into – well….bars, hence the name. Because of this, we can’t do as we are with the screen and take the state as we find it at the end of a frame, as in most cases, it would just be black, instead of awash with colours. While at some point I want to do “some” kind of simplified scan line rendering, I really don’t want to do that just yet – it’s a pretty big task in itself, and there are far bigger fish to fry – especially since I was still only doing this to see if I could get SID music playing!
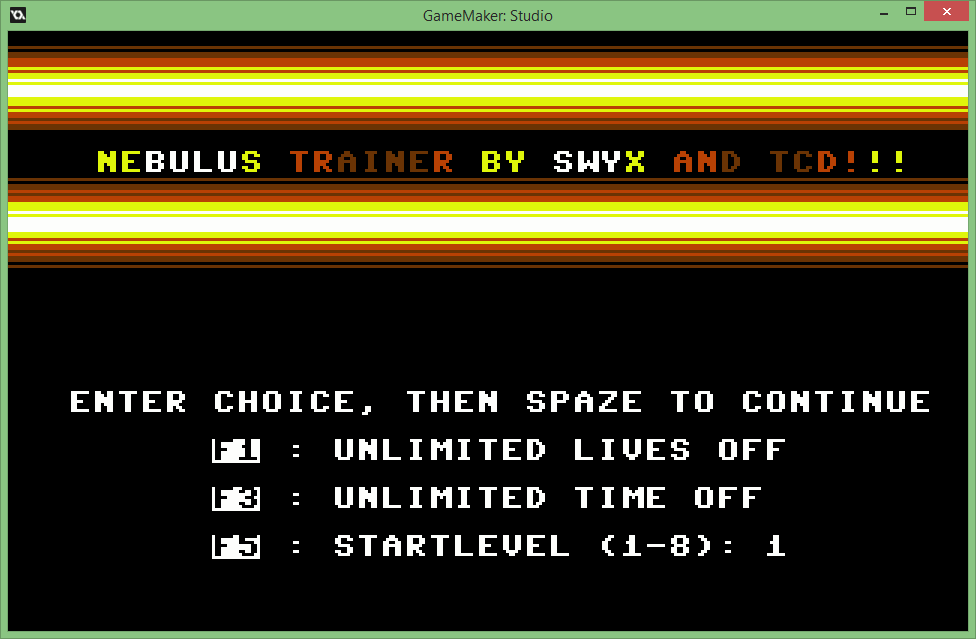
The easiest way around this problem was simply to remember the colour at the start of every line in an array. Since I have to increment a raster count at the end anyway, it seems a simple a nice place to fetch the background colour, and store it in a table for later use. This way when I draw the screen at the end of the frame, All I need to do is draw 8 horizontal coloured lines, then draw characters over the top, then another 8 lines, then another row of characters and so on until the frame is finished. Once I do all this, I get the image below (a crack intro to the game Nebulus), which is pretty funky!

The reason I’m dancing around rendering rather than just “doing it right”, is because for proper emulation, you have to do – at the very least, scan line based rendering. The real machine basically has a graphics co-processor, and while the CPU is busy processing the game, the VIC (the graphics co-processor) is busy rendering the screen. So while it draws a line, the CPU will be processing. Now, if you create a raster interrupt, you can get the CPU to synchronise with the VIC, and change it on the fly, doing things like smooth scrolling in the top of the screen, or moving sprites around so you have more than 8 – and so on. This means that in fact to do rendering completely correctly, you have to draw a “few cycles” worth as the CPU processes things. For example, what if we display a character at one colour, and we change the background colour a few cycles along the same raster line? This was possible on the actual machine (although hardly anyone was mad enough to do it).
But because of this… the simplest C64 emulator really does have to do SOME form of scanline rendering, as rendering everything at the end of the frame just won’t cut it. So, knowing the rendering I was doing is a stop gap, and trying (and failing miserably) to keep my eyes on the actual goal of doing a SID player, I’ll keep fudging it in order to keep the speed up, in the hope that a GML based SID playing is actually possible.
In the next part, I’ll discuss C64 sprites, and my sudden idea that has made things much more interesting….