n this weeks post, we’re going to take a look at the items, the level name and the Air display. Let’s start with the level name as it’s fairly simple, but to display it we really want to use the original ZX Spectrum font, as this is what Manic Miner used. Fortunately Amstrad has approved the distribution of the ROM, and so to follow the spirit of the agreement….
“Amstrad have kindly given their permission for the redistribution of their copyrighted material but retain that copyright”.
…..and good on them! The font below comes directly from the ROM code, and while we could load the rom, extract the font and draw it using surfaces…blah blah, it’s much easier to just import this, and make a sprite font from it – so that’s what we’ll do. Right click and save the font below, then create a sprite (called sFont) and add this image to it.

Once you have this, go into the image editor (using Edit Image), then use the new colour erase tool ( ) and remove the black background. Next select the Image menu from the menu bar at the top, and then pick Convert to Frames. Set the number of frames and the frames per row to 96, and the width and height to 8, then click Convert. And hay presto, a full ZX Spectrum font. Now inside the oController create event, add this
var mapping = " !\"#$%&'()*+,-./0123456789:;<=>?@ABCDEFGHIJKLMNOPQRSTUVWXYZ[\\]`_£abcdefghijklmnopqrstuvwxyz{|}~©";
zxfont = font_add_sprite_ext(sFont,mapping,0,0);
This will turn that sprite sequence into a fully usable font. The mapping tells GameMaker the order of the characters, and which ones it has, after which you can just draw_text() as normal. Now we’ll need to read the level name from the data itself. This is pretty easy, just paste this code under the level map reading
// read name
var add = base_add+512;
var name = "";
for(var n=0;n<32;n++){
    name = name+ansi_char((buffer_peek(game,add++,buffer_u8)));
}
level.name=name
show_debug_message(name);
And now all we need to do is draw it in the draw event, like this….
draw_set_colour(c_yellow)
draw_rectangle(0,16*8,256,(17*8)-1,false);
draw_set_colour(c_black);
draw_set_font(zxfont);
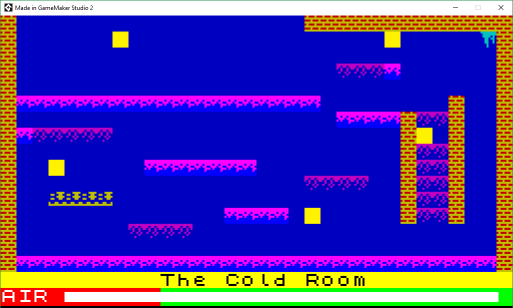
draw_text(0,16*8,lev.name); This draws the yellow background at the bottom of the map, and then the level name on top in black. To add the finishing touch, lets add the air bar as well
// draw air
CurrentAir = 31*8;
draw_set_colour($0000ff);
draw_rectangle(0,136, 80,136+8,false);
draw_set_colour($00ff00);
draw_rectangle(80,136, 256,136+8,false);
draw_set_colour(c_white);
draw_text(0,(17*8),"AIR");
draw_rectangle(32,136+2,(CurrentAir),136+6, false);
This will draw a red/green bar, with the AIR bar on top. CurrentAir would normally be in the create event, then reduced over time, but since we’re just showing it off, it can remain here for now. This now gives is a much nicer image, feeling almost like a game now!

The next thing on our list is the items, the things you actually collect to finish a level. We’ll need both the position and the graphics for these. Lets start with the position of them all first. There are up to 5 items per level and it’s a simple case of looping through where they are stored (base+629) and lifting out the X,Y values. The format also allows for a starting colour, but we won’t bother with that. Paste this after the name extraction….
// get items
var add = base_address+629;
items = 0;
for(var p=0;p<5;p++) items[p]=-1;
for(var b=0;b<5;b++)
{
    var item = [];
    var a = buffer_peek(game,add,buffer_u8);
    if( a!=255)
    {
        item[0] = (a&7);            // colour
        a = buffer_peek(game,add+1,buffer_u16);
        item[1] = (a&31)*8;         // X
        item[2] = ((a>>5)&$f)*8;        // Y start!
        add+=5;
        items[b] = item;
    }else{
        break;
    }
}
level.items= items;
This will loop through getting the item, but if the colour is 255, then it’s the end of the list. This allows less than 5 items per level. The items location is in characters (tile coordinates) so we multiply by 8 for each to get the pixel location. We’ll now create a new object oItem that will act as the pickups, and in it we’ll create a flashing sprite with a speed of 7.

Once attached to our oItem object, we can now spawn these when we change level. Lets clean up our Change level script while we’re at it, here’s a completely new one,
/// @description Delete the old level, and init the new one

with(oItem) instance_destroy(id);


// Now create new ones based on the level we're changing to
// first get the level container
var level = levels[argument0];

// create all items
var items = level.items;
for(var i=0;i<5;i++)
{
    var item = items[i];
    if( item == -1 ) break;

    var iItem = instance_create_depth(0,0,-100,oItem);
    iItem.x = item[1];
    iItem.y = item[2];
}
After running this, we’ll see our pickups flashing away in the right locations – for every level.
The last part we’ll look at is actually getting hold of the pick up graphics. This is much the same as the tile block graphics – or rather, exactly the same really. We’ll add this code into the LoadGame() function just after item code above, it simply reads the 8 bytes each level has for the item graphic and stores it in the level data.
// read the item graphic data
var add = base_address+692;
var it = [];
for(var g=0;g<8;g++){
    it[g] = buffer_peek(game,add++,buffer_u8);
}
level.item_graphic = it;
global.item_graphic = -1;
Each level has just one tile graphic, so we can create a surface 8 pixels wide by 8*20 height, and generate all the items onto that. Next open the CreateGraphics() script and add this to the bottom.
// Init pickup surface
if(!surface_exists(global.item_graphic))
{
    global.item_graphic = surface_create(8,8*20);
    surface_set_target(global.item_graphic);
    draw_clear_alpha(0,0);

    for(var lev=0;lev<20;lev++)
    {
        var itg = levels[lev].item_graphic;
        for(var yy=0;yy<8;yy++)
        {
            var row = itg[yy];
            for(var xi=0;xi<=8;xi++)
            {
                if( ( (row>>xi)&1)!=0 ){
                    draw_point_color(7-xi,yy+(lev*8),$ffffff);
                }
            }
        }
    }
    surface_reset_target();
}
Just like tiles, we loop through all 20 levels, each line of the item, and each pixel on that line. Unlike the tiles however, we’ll make this graphics white so we can colour it dynamically in the draw event of the oItem object – like this…
/// @description Draw the item graphic
if( global.item_graphic!=-1){
    colour = ((colour+1)&$f);
    draw_surface_part_ext(global.item_graphic,0,oController.CurrentLevel*8,8,8, x,y,1,1,GetColour(colour>>1),1);
}
You’ll notice we have a colour variable in here that cycles around from 1 to 15, so we’ll need to initialise this in the create event.
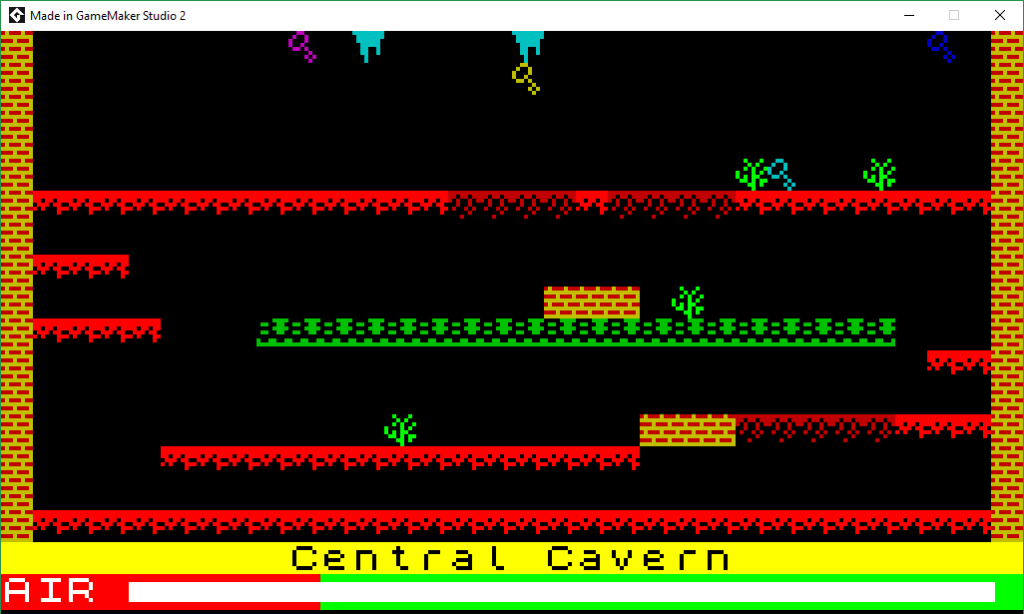
/// @description Pick a random start colour
colour = irandom(7*3);
If you now run this, you should see something like the image below, but with all the items flashing! You can also look at all the other levels, and they should have their own graphic (sometimes) and in the correct locations.
And there we shall leave it. Next time we’ll take a look at the baddies (or guardians as they are called in that document), both sprite graphics and their movement.