There are always some games that like to do very retro looking games, usually in the style of a Spectrum since you still get “hi-res” from it, rather than the C64 or something where pixels were doubled and couple look a bit nasty, even for today’s retro fan club. However, as retro as they look, they never really capture the full spirit of the old machine because of one thing – colour clash.
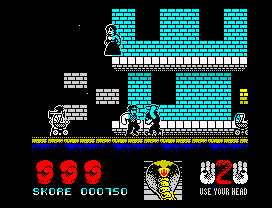
The ZX Spectrum’s screen consisted of a hires (for its day) bitmap of 256×192 pixels, and a colour (or attribute) map. The pixels in the bitmap would get coloured every 8×8 pixels depending on the colour in the attribute map.
So, roll onto modern day. We no longer have separate pixels and attributes so simulating this old mode can be a little tricky.
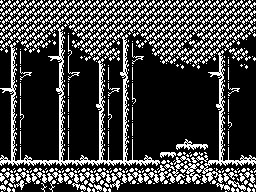
Roll on further and I suddenly realised a really simple way of achieving this using the hardware we all have in our machines already. So lets say we simulate the way the spectrum drew things, a bitmap screen an a colour map. First, lets draw everything in “white” pixels only – which is much like the spectrum would be, it would look something like this.
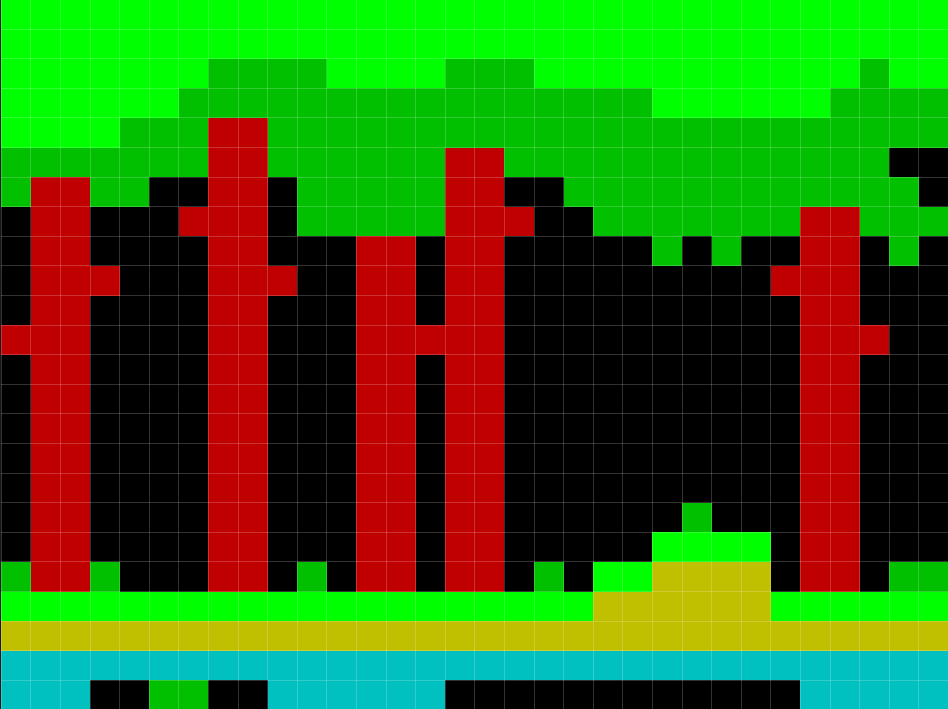
If we then drew the colour map, we’d just end up with big blocks of colour going over the top of the screen – like this
And this is where modern hardware struggles. However… if we could somehow use the first image, as a “mask” for the second, then we could get rid of the pixels from the blocky colour image and get the image we wanted. We could generate both these images and then send them through a shader and do – well, whatever we want to, but there’s actually a simpler way.
Let me introduce you to destination alpha. DestAlpha is the alpha channel on the screen surface (or render target) that you render to all the time anyway. Whenever you draw a sprite the RGB goes onto the surface from the texture/sprite your drawing, and so does the alpha. When you clear the screen to black with no alpha (or UINT32 of 0x00000000), and then draw a sprite onto it, you’re effectively making a copy of a sprite. When you start drawing lots of other sprites it all gets a bit of a mess and is basically useless, but if you control it…it can be very handy
There’s also another string for our bow; the colour channel write mask. This lets you switch off and on the different channels of the screen (red,green,blue or alpha). Now it gets very interesting…..
Lets say that black and white image above was also represented in via the alpha channel.
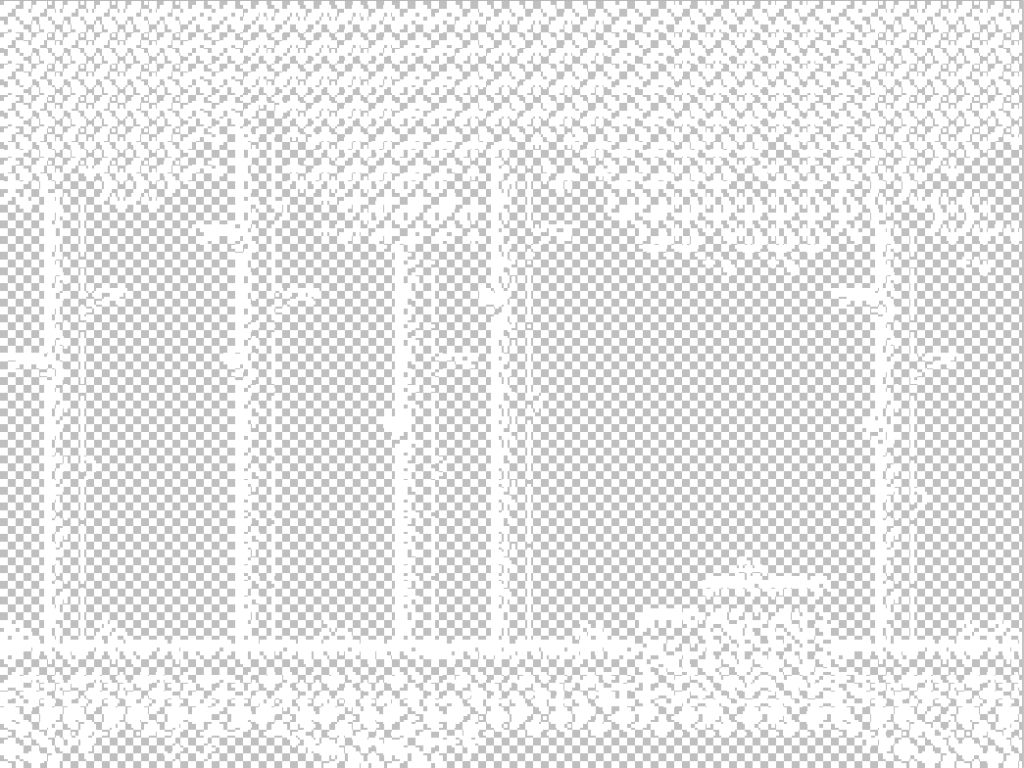
The image shown here has white pixels where there is data, and transparent everywhere else. This is a “mask” of the data we want to draw, and if we put the same data into the alpha channel we can use “destalpha” to actually mask everything.
So, the first thing we need to do is draw the background – whatever we want, however we want. Next we need to clear the alpha channel only – leaving the colour screen intact. We do this by setting the colour channel mask so that only the alpha channel is being written to. We can then render a filled rectangle with alpha of 0. One the alpha channel is cleared, we then set the colour mask back to normal and render everything else.
Once this is done, the alpha channel will look something like the transparent image above, a lovely alpha mask – now if only we could add this to a sprite it would be like any normal texture…. Step in dest alpha. Normally were use source alpha, inverse source alpha as the blend mode. This would normally take the alpha value from the source i.e. the texture, but now we’ll use destalpha, inverse destalpha. This will use the screens alpha channel as the alpha for the blend.
Now when we render the solid rectangles of colour that would be the colour mask, the underlying pixels that crated the alpha channel, will only let colour through were we drew a pixel in the first place.
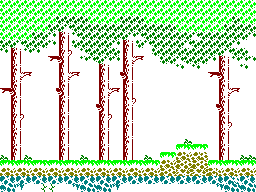
So, by using the transparent image as the alpha channel of the blocky image, we’re left with the image above – which is just like the spectrum.
Now comes the good bit. When we render objects – players, baddies, pickups etc, all we need to then do is change the colour block in the blocky image (which is rendered layer), and then this gives us the same blocky, colour clash feel that the spectrum had
Here’s the general order to rendering things….
Render “paper” colour map (32×24 of 8×8 blocks of colour)
Set colour mask to alpha only
Disable blending and alpha-test
Draw giant flat rectangle of 0 alpha, and 0 colour
Reset colour mask to full ARGB
Enable alpha blend and alpha test
Draw everything
Set colour write mask to RGB – disabling ALPHA
Enable alpha blend and alpha test
Set blend mode to DestAlpha, Inv_DestAlpha
Draw all colour blocks (32×24 of 8×8 blocks of solid colour)
Set blend mode back to SrcAlpha, Inv_SrcAlpha
Once you’ve done all this…. you’ll be using the “pixels” from your sprites, and the colour from the attribute map. Whats better is every bit of hardware out there can do this. It’s all standard blend modes stuff – even older hardware. If you’ve done all this, you should get something like the video below. Make sure ALL your sprites background graphics are transparent, and don’t have solid pixel colours (like black) as this will effect the mask.
One final point… It should be noted that the “colour” pixels written at the same time of the mask aren’t really needed, but if you colour them as they are meant to be (not just white), then it means you can easily switch the effect on and off without affecting the game. This gives the end user the option to have colour clash or not, which is a nice side effect.