With the release of the updated OS, BBC Basic and VDP code, a new graphics format has become available – 2222. What this does is gives us a format that exactly mirrors the hardware itself, allowing for the fastest rendering possible.
It also makes file sizes a third the size, as we no longer have to load in full R,G,B channels and that’s always great news as loading speed will be greatly increased.
However, it’s not all plain sailing, the new format has to be created using the new Buffer API, and that’s only loosely documented at the moment, with little or no examples around yet.
Still, with a little support from Discord, it was worth giving it a go. So first, we have to change our tools to output the new format. This is fairly easy, though I did mess up and forget some shifts as I had no way of testing it and it was outputting all zeros….
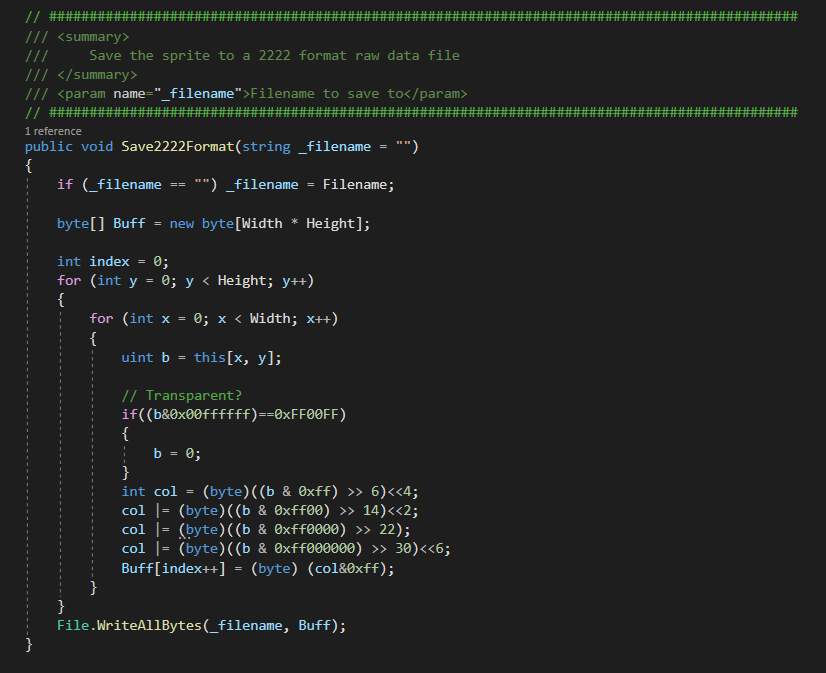
This lives in the Sprite.cs file, and stores the raw ARGB data that I access with the this[ ] modifier. All it does is loop through the 2D grid of pixels (hence the X and Y loops), and then converts a 32bit ARGB, into an 8bit 2222 ARGB format pixel. As we now have alpha, I can also do the “transparent” colour check in here, and if set, then I can force a transparent pixel output.
This means we no longer need a separate “bitmap” and “sprite” loader, as both formats not contain alpha – which is great. Less code to write and manage is always a good thing.
So as in our 32bit data each channel is 8bits, all we need to do is isolate the colour using an AND (& in C#), and then shift the bits down so only 2 remain. You can see in the first line, “col” is set to “((b&0xff)>>6)<<4“. This takes the lowest channel, masks it off from the others so we ONLY have this colour, then shifts those 8 bits down 6. This forces 0‘s in the top, and the lower bits are lost as they shift off the bottom. This leaves us with just 2 bits form this colour. We then shift them into their final position with the <<4. And once we do this for the other channels, that’s all there is to it, so we can store it in the output buffer.
Once it’s all done, we then save this to the file – be that background image, or Lemming sprite.
Next we need to look at the BASIC loading code. It’s mostly the same, except we’ve some different VDU commands, and we only need to write 1 value – not 3.
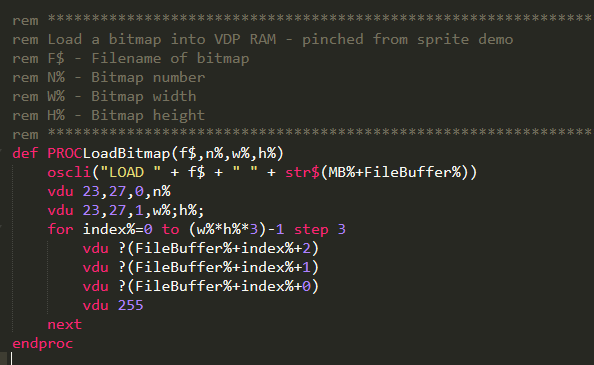
This is the old version, where it defines a bitmap using the first 2 VDU commands, then loads in the RGB data – and forcing opaque alpha, into it. As you can see, it’ll requires 4 times the memory of the 2222 format, so it’s a great saving, as well as being faster. So what do we need to do to change this?
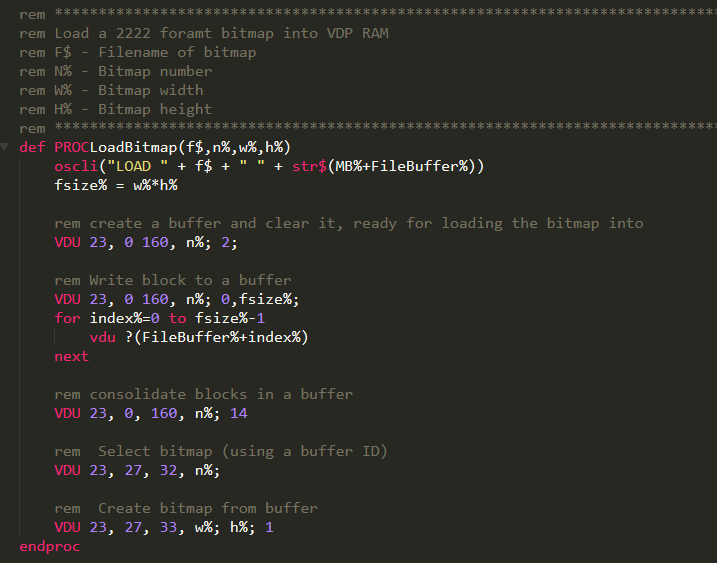
So here you can see we’ve 2 new commands. The first vdu 23,0,160,<bufferid>;2; is a command to create and clear a new buffer, while the second vdu 23,0,160,<bufferid>;0,<size>; allocates the space we’ll need for that buffer, and then awaits for the data to be delivered.
After that, as previously, it’s just a matter of looping through the loaded file data and sending it to the buffer – but this time, only a single byte, not 4.
Once we’ve done this we need to “consolidate” the buffer. I’ve been told this is if you have multiple blocks, and as we only have one, we don’t really need to do this. But I suspect this is good a practice to get into, and will save you some bugs later when you “forget” it, and then suddenly have multiple blocks…
We then select a bitmap – using the same buffer ID, and lastly create it. So now, that we can use the buffer ID number to draw the bitmap. This is done almost as before, by selecting the bitmap, and then drawing it.
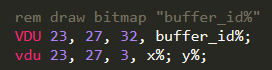
These are different commands again, but are simple replacements, so easy to drop in. Once we’ve done this, we get our level loaded up, and ready to go!
Next, we need to update the Lemming sprite loading. This is again a simple process as we can now just use the bitmap loading code.
So we change from this….
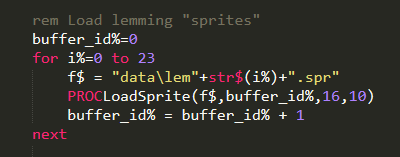
To this….
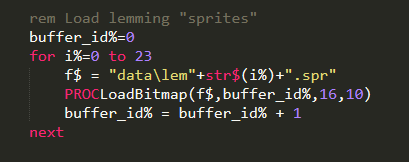
And since our bitmap code now contains the alpha channel, that’s all the sprite loading needs to change – great eh!
The last thing we need to do is change the sprite setup. As we’re using the new bitmap/buffers, we have a new command to add frames to the sprite. So we go from this….
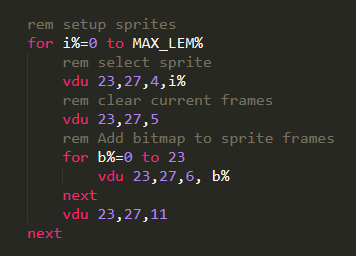
To this….
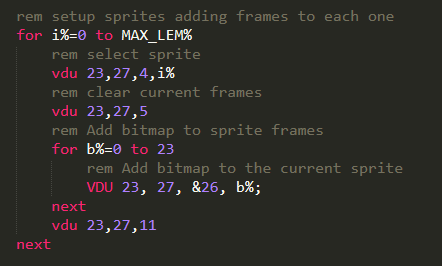
As you can see, all we’ve done is replace the VDU 23,27,6,b% with VDU 23,27,&26,b%. This will now use out 16bit buffer id instead of the old 8bit bitmap id.
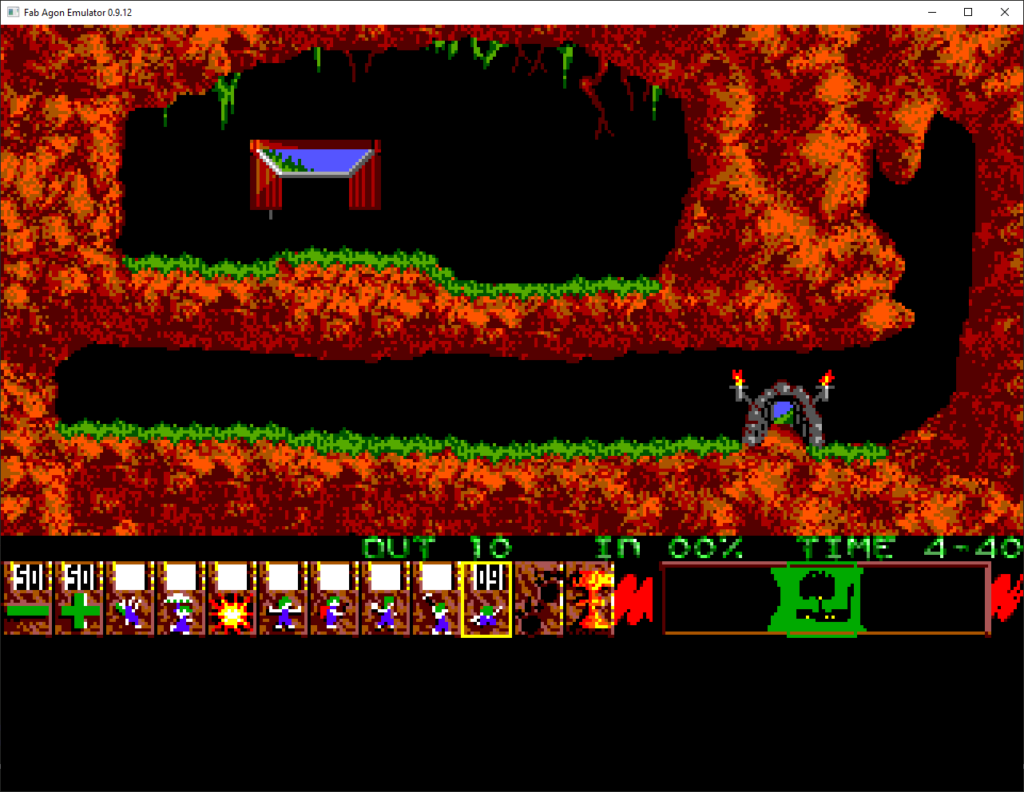
And that as they say… is that! So once we run, we can then see our Lemmings walking about exactly as before, but we’re now using the new format, and taking up 4 times less memory.
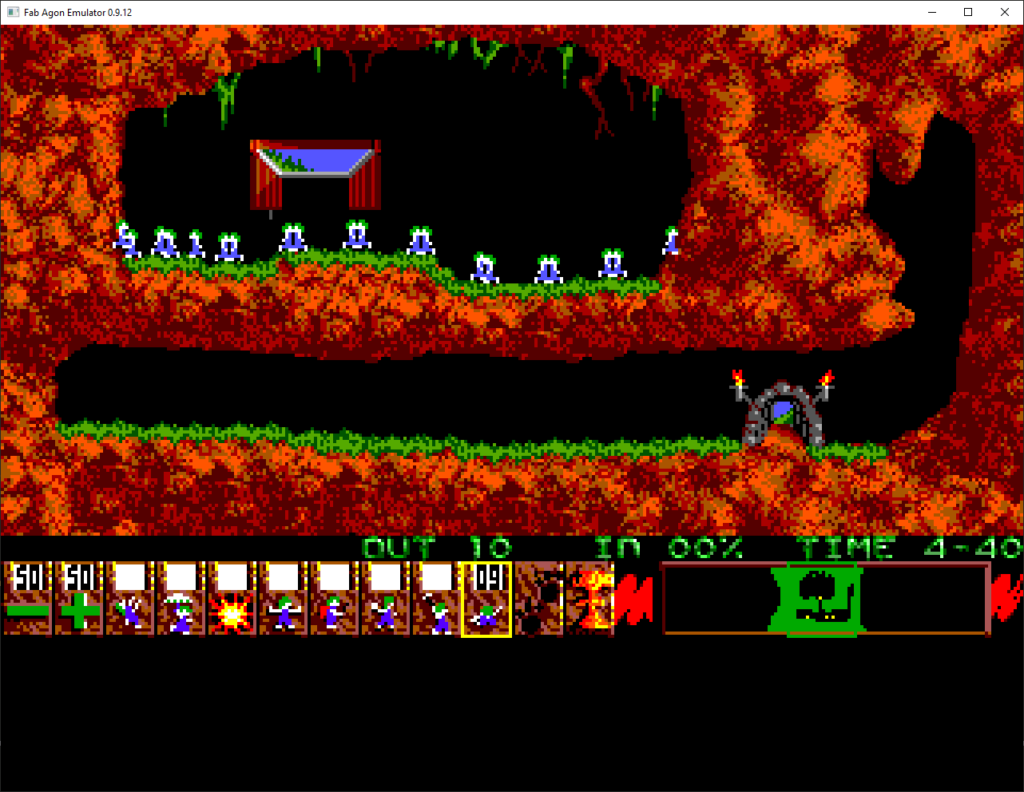
What’s also good, is that because it’s now all help “in memory”, and using the new API, buffers can be modified, we could actually add/remove from the background, allowing use to “actually” make lemmings!
It’s worth remembering that Lemmings on the spectrum only had 20 Lemmings walking about, and it was still a fun game. While it’s great seeing lots and lots of them, it’s not “vital” to gameplay. So it is now fully possibly to create lemmings, in BASIC on the AgonConsole8! How cool would that be!!
I may toy with this over time, and see if I can do that “add” and “remove” code, as it could be quite interesting…. while I’ve broken everything up into 32×32 tiles here, I suspect I could now have a single bitmap, as I only did that to fit it in memory and load/draw as I went. This would make adding/removing from the background much simpler, so I may revert to that….
However… the important part of this demo, is now that bitmap loading code. It works, it’s simple, and you can now pinch it to use in your own games/demos if you want.
Remember this project – and the tools, are up and public on my github page, so feel free to grab the whole thing and tinker with it.
https://github.com/mikedailly/Agon